If you are running vehicles multiple hours a day or in some form of a professional racing league, having your parts professionally coated is probably your best option. But what about the average guy who is looking to restore their dream car, but is on a budget. Do-it-Yourself options can help save some money.
Deciding what brand name or type of coating would be the most difficult choice.
They have cans that look like traditional paint and used in paint sprayers, or Aerosol can options. The Aerosol can option may not always be ceramic coatings, they may just be high-temp resistant paint. If you have an air compressor and access to a paint spray gun that would be best. Even a cheap spray gun from a local supply store would work.
Steps to ceramic coating of your engine parts
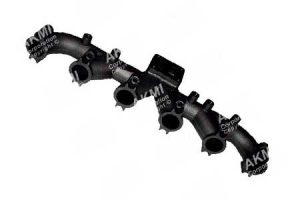
Let’s say you want to put a ceramic coating on your exhaust manifold, here is what I have found to be the basic steps:
- Make sure you clean the entire exhaust manifold inside as well as the outside. Professionals will have fancy chemicals to help assist them, but a strong household degreaser can work just as well.
- Then you would want to sandblast the manifold to remove any loose pieces or dirt the degreaser couldn’t remove. If you do not have a sandblasting tool or access to one, then you can use steel wool or sandpaper. It may take longer to do, but prepping the surface is a must.
- Prepare your work area. Lay down tarps and cover anything (in immediate area) that you do not want to be painted. If possible, hang the part(s) by a wire, so the manifold or its pieces are suspended in the air. This would be an ideal position for painting, but not necessary.
- Put on a safety mask or respirator, gloves, safety glasses and make sure you have plenty of ventilation if working in a garage or home workshop area.
- Before you begin to spray, make sure you read the instructions on the label of the product you purchased.
- Spray an even coating over the entire piece(s). Allow a few minutes to dry before applying multiple coats.

Curing process
After applying the final layer to your exhaust manifold, the curing process is next. Professionals have industrial ovens and other heating equipment that can begin the curing process no problem. Using a conventional oven that can reach a temperature of 500 degrees can work, but you wouldn’t want to use the oven from your kitchen. Without access to an oven or a heat gun, you would need to let the manifold dry for at least eight hours.
The final stages of the curing process occur while the parts are installed on the engine. You want to start the vehicle and let the engine run on idle for at least an hour, or drive the vehicle around. Then let your engine cool down completely and repeat the cycle. This may need to be done a few times, refer to the product instructions.
High temperatures
One important thing to note is that excessive heat from a poorly tuned engine can actually damage the ceramic coating of your exhaust manifold or other coated parts. Make sure all adjustments to camshafts, springs, valves, timing, and fuel injection system are done, otherwise all the time spent coating your manifold and other parts could be time wasted.
Whether you are looking to restore your dream car, or you would like better performance and protection for your everyday car, the do-it-yourself option for ceramic coating can save you some money that can be used for different areas of your vehicle.
Benefits of ceramic coating your exhaust manifold
- Increase performance reducing the backpressure.
- Surface temperature reduction: Heat at those levels is enough to do serious damage to internal parts of the vehicle.
- Prevent corrosion: Ceramic has high resistance and is very durable.
Exhaust manifold ceramic coating cost
The price really depends on the version of your exhaust manifold, each part needs a process before applying the ceramic coating. So the prices can be around 40$ to 250$ or more. (Remember that there are estimates)


